
Lotaotao Logo
Manufacturing

Sliding Lid Wooden Boxes: Frame Assembly and Sanding, Step by Step

Four sides, a bottom, and a lid that runs in a groove. A line supervisor walks through how 2,400 pine sliding lid boxes get cut, glued, squared, sanded and fitted, and where each step fails.

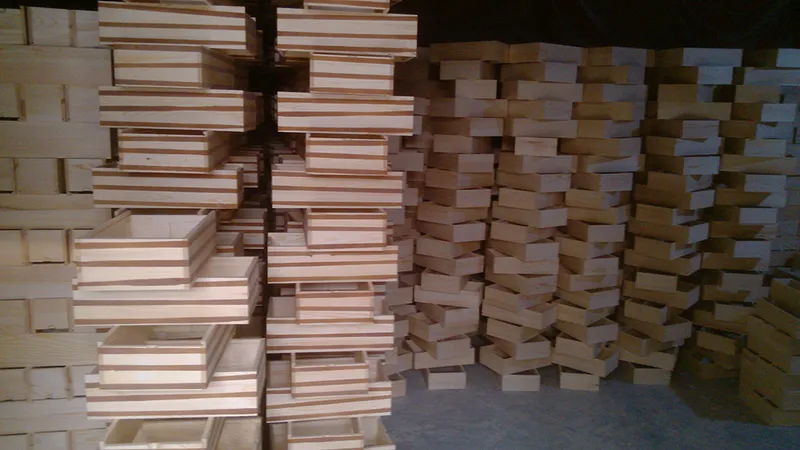
Assembled pine sliding lid wooden boxes stacked on the factory bench after glue-up

The Order on the Line

The job in front of us is 2,400 pine sliding-lid boxes, 300 × 200 × 90 mm, with 9 mm sides and a 6 mm lid and bottom. The buyer distributes in the US Midwest, so the pine leaves the kiln at 8 percent moisture content and the assembly room holds 20–25°C at 50–65 percent relative humidity. Those numbers are not decoration. They set the clearance in the lid groove, the clamp time, and the point at which the box stops moving.

A box like this has six parts and one machined feature that decides whether it works: the groove the lid runs in. Everything downstream of the moulder — glue-up, squaring, sanding, lid fit — either protects that groove or ruins it. When a buyer opens a carton and finds lids that no longer slide, the fault is almost never the finish. It sits back at the machine or the clamp rack.

Here is how the order runs, in the order it actually runs, with the values the line works to.

Cutting Components and the Lid Groove

Sides are planed from 25 mm pine board down to 9 mm, then ripped to width on a sliding table saw. Each side gets a 6 mm groove, 5 mm deep, set 4 mm in from the inside face. That leaves 4 mm of pine as the outer wall of the groove — the strip of wood that keeps the lid captive.

Cut that groove 7 mm deep in a 9 mm side and the outer wall drops to 2 mm. The box still assembles. It looks right on the bench. Then a carton lands on a corner in a warehouse and the wall splits along the glue line, and the lid falls out somewhere between the pallet and the shelf.

Groove width is 6.2 mm for a 6.0 mm lid panel. The 0.2 mm is clearance, not slop. A 300 mm pine lid gains roughly 3 mm of width when it moves from 8 percent to 12 percent moisture content, because pine moves about a quarter of a percent of its width per point of moisture. Cut the groove to the panel and that growth becomes a jam. The joint specification for tongue-and-groove work allows 0.2–0.5 mm of width clearance; we sit at the bottom of that range, because a lid with 0.5 mm of play rattles when the box is carried and buyers read that rattle as poor quality.

Lid panels are cut 2 mm under the frame's outside length so the lid closes just inside the box line. The finger pull is 22 mm wide and 12 mm deep, machined in the same CNC cycle as the dimensioning pass. Pulls are cut before sanding, never after. A routed pull cut into a finished face tears the grain at the exit edge, and no amount of touch-up hides it under clear coat.

Bottom panels are 3 mm plywood, cut 4 mm under the frame opening at each end. They are stacked on the same pallet as their frames and stay there until the frame comes out of cure.

Glue-Up: Four Sides, One Open Frame

The frame closes with PVAc D3. D3 carries water resistance, which a box sitting in a retail window in a humid city needs. Spread is 180–220 g/m² on both mating faces, applied by roller. A 2,400-piece run consumes about 19 kg of adhesive.

The binding constraint is open time: 4–10 minutes at 22°C. Two assemblers work with four clamps each and have to close every joint inside that window. Adhesive applied to a frame that sits waiting for eight minutes has already skinned over. The joint closes, looks correct, and tests at roughly half strength when the QC bench pulls a sample apart. On a humid afternoon the open time shortens and the rhythm has to shorten with it, so the line leader checks the pot clock every hour rather than once a shift.

Clamping pressure is 0.8–1.2 MPa, set with a torque limiter. Hand-tightened bar clamps on soft pine reach 2 MPa without any effort and crush the end grain, leaving a shadow line that no amount of sanding removes. Cauls are 18 mm plywood faced with packing tape, so a bead of squeeze-out bonds to the tape instead of the frame. Clamp bars are spaced 80 mm from each corner; a clamp in the middle of a 300 mm side bends the panel and pulls the joint open at both ends.

The frame stays in the press 45–90 minutes. At 45 minutes the joint holds under its own weight. At 90 minutes the frame handles without support and goes onto the curing rack. Squeeze-out gets scraped at the 30-minute mark, when the bead is firm enough to lift in one piece. Wipe it with a wet cloth at that point and the adhesive smears into the pores, and the smear reads as a pale patch under clear finish. A cabinet scraper takes 20 seconds per box and saves a rework cycle.

Pine is soft enough that clamp marks are the main cosmetic risk at this station. Our wood materials guide lists density and machining behaviour by species if you want to compare the pine you are being quoted against what the line is running.

Checking Square With a Diagonal

Every frame gets measured across both diagonals as it leaves the press. On a 300 × 200 mm opening each diagonal runs 360.6 mm. The limit is 0.8 mm difference between the two.

A frame 2 mm out of square passes a visual check and fails at the lid. The groove on the long side is no longer parallel to the opposite side, so the lid runs tight at one end of its travel and loose at the other. By the time the box is finished, the error shows up as a binding lid on a finished unit, and the only real repair is a new frame.

The measurement takes 15 seconds with a steel rule and a stop block, and it catches more scrap than any other station on this line. Racking comes from three sources: uneven clamp pressure, a starved joint that slips under load, and panels cut out of parallel. The diagonal catches the result without naming the cause, and the correction is the same either way — back into the press with a clamp across the long diagonal for 20 minutes, then measure again.

Frames that fail twice are broken out and the parts salvaged. Two rounds of clamping on a D3 joint weakens the glue line, and a frame that needed two corrections carries a joint problem that will reappear in the customer's hands six weeks later. Recording the failure rate by assembler and by clamp bank is worth more than any inspection sheet: when the number climbs, a clamp is out of calibration or a new hire is over-tightening.

Curing Before the Bottom Goes On

Frames cure 24 hours before the bottom is fitted, and 48 hours before any operation that removes material. PVAc reaches about 70 percent of final strength in 2–4 hours and full cure in 24. Machining at 70 percent strength pulls the joint open, and the gap does not close when the adhesive finishes curing. The line runs a two-day buffer between the press and the trim station for exactly this reason, and the buffer is sized on the press output, not on the ship date.

The bottom is 3 mm plywood in a 4 mm groove, 3 mm deep, glued at the two short ends only. The long edges float. Glue the bottom all round and the panel has nowhere to expand, and the frame splits at a corner through the first heating season. This is the most common construction fault in boxes that come back to us for repair, and it is invisible at the factory gate.

Sanding of the raw frame starts at this stage, before the bottom goes in, so the sanding block reaches the inside faces. Frames are sanded flat on the outer faces with the bottom opening open, then the bottom is fitted, then the small wedge of squeeze-out at the bottom line is scraped and touched by hand.

Lid panels are cut at this stage, 2 mm oversize, and stacked with their frames. They are not fitted yet. Fitting waits until after sanding, for a reason covered below.

Sanding in Sequence, Not by Feel

Sanding runs P40–P60 to take out planer and router marks, then P80–P100, P120–P150, P180–P240, and P280–P320 before finish. No step skips more than two grits. Dust comes off between grits with a brush and a vacuum, because a P120 scratch buried under P240 opens up the moment the first coat lands.

Step Grit What it does
1 P40–P60 Removes planer chatter, router marks, glue ridges
2 P80–P100 Removes P60 scratches, starts edge easing
3 P120–P150 First inspection under light, grain raise handled
4 P180–P240 Final surface; edges worked by hand on a block
5 P280–P320 Pre-finish scuff, between-coat work

Edges take the most attention and the least pressure. A 9 mm pine edge under a random orbit sander with P40 loses 0.3 mm in about four seconds, and the groove wall is then thin enough to flex when the lid runs. Edges are sanded by hand on a block through P120, and the machine touches faces only. The operator who "just cleans up the corner" with the orbital is the source of most sand-through scrap on this line.

Pine punishes heavy passes. Earlywood and latewood cut at different rates, and one hard pass at P80 leaves a washboard that no finer grit removes. Two light passes at each step beat one heavy pass at every stage.

Frames and lids are inspected at 600–1,000 lux from 40–50 cm after P180 and again after P320. Catching a scratch at P180 costs five minutes at the bench. Catching it after finish costs a strip and a re-spray, plus the risk that the second finish coat does not match the first. Our surface finishing guide covers the coat sequence that follows this sanding schedule.

Fitting the Lid After Sanding

The lid is fitted last, to the finished groove. Sanding removes 0.2–0.4 mm from each groove wall, so a lid that runs snug on raw timber runs loose after sanding and finishing. Fit it before sanding and the customer receives a box whose lid slides on its own and clacks when the carton is tilted.

The fit we ship: the lid moves under a light push of two fingers and travels no more than 15 mm when the box is tipped 30 degrees. Total clearance across the groove is 0.3–0.5 mm, checked with a feeler gauge at each end. Both ends get measured, because a frame that passed the diagonal check within 0.8 mm still carries a slight taper, and a lid that fits the wide end binds at the narrow one.

Lids are numbered to their frames with a pencil mark on the inside face before finishing. A 2,400-piece order mixes lids on the finishing rack otherwise, and the fit you approved on the sample disappears into an average. After fitting, each box gets 20 open-and-close cycles. A lid that catches on the third pass catches on a burr in the groove, and the burr comes off with P320 on a folded strip.

For a box sold on the strength of how the lid feels, this station is the product. It is also the cheapest place to spend labour, because a five-minute fit here replaces a replacement shipment later. If you are specifying a similar box, our sliding lid wooden gift box shows the construction this sequence produces.

Where the Process Goes Wrong

Four failures account for most of the rejects on a sliding lid run, and each one starts at a station you can point to.

  • Glue squeeze-out left on the face. Scraped too late, it smears into the pores and shows as a pale patch under clear finish. The fix is a scraper at 30 minutes, not a cloth at 60.
  • Frames racked out of square. Caught by the diagonal measurement or not at all. A frame that measures 1.5 mm out and goes to sanding comes back as a lid complaint, and by then the whole box is scrap.
  • Sanding through a thin edge. The groove wall on a 9 mm side is 4 mm wide. One heavy pass with P40 on a random orbit takes a third of it, and the wall flexes under the lid for the rest of the box's life.
  • Lid binding after a humidity change. Always a clearance decision made at the machine, never a finishing problem. A lid fitted at 0.1 mm total clearance works in the factory and locks in a container crossing the tropics.

The 8 percent moisture target and the 0.3–0.5 mm clearance are the two numbers that keep a pine box working in a dry market. Everything else on this line is tolerance stacking around them. A buyer visiting the factory should ask to see the moisture meter log and the diagonal check sheet before looking at a single finished box.

The same frame, joint and cure logic carries into every box we build. If your order is larger or more complex than a four-sided pine frame, the plant-level view of custom wooden box manufacturing covers how the schedule and the inspection gates change.

Frequently Asked Questions

What clearance should a sliding lid have in its groove?+

Target 0.3–0.5 mm total across the groove width for a 6 mm pine lid, checked with a feeler gauge at both ends of the box. That allows the panel to move about 3 mm across a four-point moisture swing without binding or rattling. Anything under 0.2 mm binds after a climate change; anything over 0.7 mm feels loose in the hand.

Why is the lid fitted after sanding instead of before?+

Sanding removes 0.2–0.4 mm from each groove wall and finishing adds a thin film on top. A lid fitted to raw timber is already loose by the time the box is finished, and it clacks in the carton. We sand the frame, clean the groove, then dimension the lid to the finished groove and number it to its frame.

How long must a glued frame cure before the bottom is fitted?+

Twenty-four hours before the bottom goes in, and 48 hours before any machining that removes material. PVAc D3 reaches about 70 percent strength in 2–4 hours and full cure in 24. Cutting or trimming a joint at 70 percent pulls it open, and the gap does not close once the adhesive finishes curing.

What causes a sliding lid to bind after shipping?+

Almost always moisture uptake by the lid panel, not a finishing defect. A 300 mm pine lid gains about 3 mm of width moving from 8 to 12 percent moisture content. If the groove was cut tight, that growth closes the clearance. Boxes built for dry markets need the 8 percent target enforced at the kiln and 0.3–0.5 mm of clearance at the machine.

Which grit should pine boxes be sanded to before clear finish?+

P280–P320 on the faces, after working up through P40–P60, P80–P100, P120–P150 and P180–P240 without skipping more than two steps. Edges get worked by hand on a block through P120 only, because a machine sander takes too much material off a 4 mm groove wall.

Related Pages

Need This Made to Your Spec?

We manufacture custom wooden boxes, crates, trays, and pet furniture in our own factory in China. Send your drawings or samples for a quote.

Request a Quote →